Expense Tracker - Building a Frictionless Experience(Adding Home Screen Widgets)
As an expense tracker app, speed is everything. For the work to be useful, the Add expense feature must be accessible as quickly as possible. Every extra tap or second spent waiting for an app to load is friction that discourages tracking.
To solve this, I decided to build Android Home Screen widgets for my React Native Expense Tracker. The goal was simple: one tap from the home screen should instantly open the "Add Expense" screen, whether the app is running in the background or completely killed.
Here's the technical deep-dive into how I implemented these widgets, the challenges I faced with React Native's bridge timing, and the ultimate architecture I settled on.
The Design: Form Meets Function
I designed two distinct widgets to give users choice based on their home screen real estate:
- Quick Add (1×1): A compact, horizontal button consisting of a stylized wallet icon and an "Add Expense" label.
- Detailed Add (4×2): A wider, more prominent rectangular widget featuring the app's branding and an explicit "Tap to add" call-to-action.
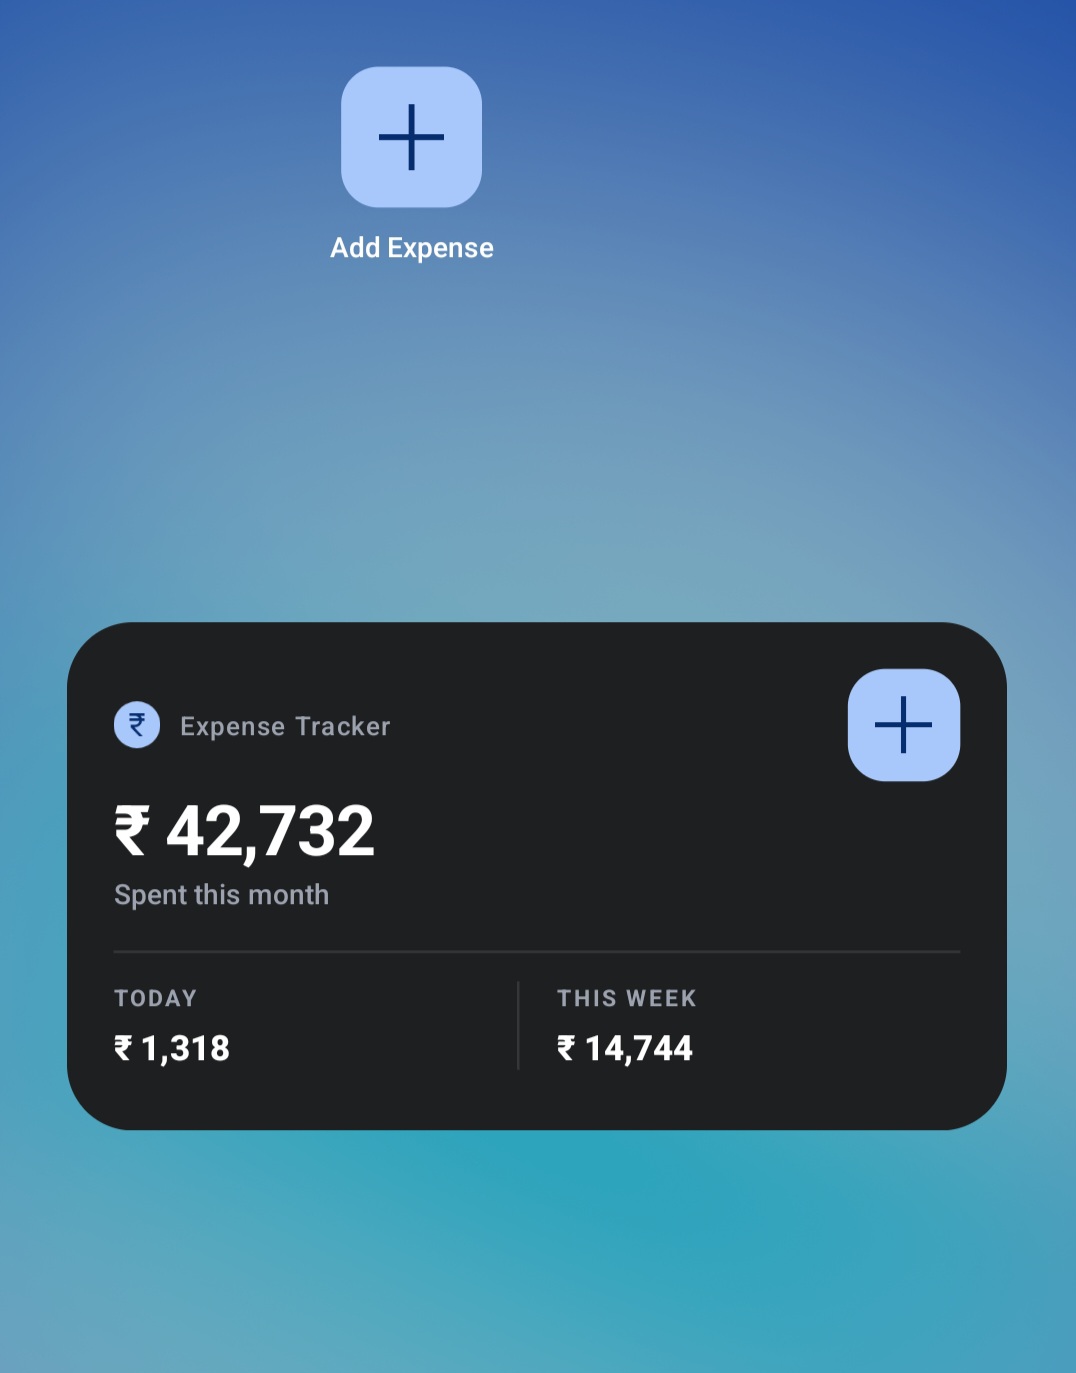
Both widgets serve the exact same purpose under the hood: they act as a high-speed launchpad into the app's core feature.
Architecture Iteration 1: The Native Module & Event Emitter Approach
Initially, I approached this by having the Android widget send a broadcast intent to MainActivity, which would then communicate with the React Native JavaScript context.
My first architecture looked like this:
- Widget tap triggers an
ACTION_ADD_EXPENSEintent. MainActivityintercepts the intent.MainActivityemits anonWidgetAddExpenseevent viaDeviceEventEmitter.- The React Native
AppNavigatorlistens for this event and callsnavigation.navigate('AddExpense').
The Challenge: The Cold Start Race Condition
This worked flawlessly on warm starts (when the app was already running in the background). However, on cold starts (when the app was killed), it completely failed.
The issue was a classic race condition. The native Android side would fire the DeviceEventEmitter event before the React Native JavaScript bundle had finished loading and registering its listeners. The event essentially vanished into the void.
I tried patching this by creating a custom WidgetModule (a Java NativeModule). On a cold start, the Native side would set a pendingWidgetAction = true flag. The JS side would poll WidgetModule.consumePendingAction() on mount. While this worked, it felt fragile and required arbitrary setTimeout delays to ensure React Navigation was fully mounted before routing.
Architecture Iteration 2: Deep Linking
I realized I was reinventing the wheel. The problem of "launching an app to a specific screen from outside the app" is a solved problem: Deep Linking.
React Navigation has incredibly robust built-in support for deep linking. It automatically handles cold starts, warm starts, and background-to-foreground transitions seamlessly without any manual event listeners.
Here is the final, much cleaner architecture:
The Implementation Details
1. The Android Widget Provider:
Instead of a custom action, the widget's PendingIntent is a standard VIEW action with a custom URI scheme:
// AddExpenseWidgetProvider.kt
val intent = Intent(Intent.ACTION_VIEW, Uri.parse("expensetracker://add-expense")).apply {
    setPackage(context.packageName)
    flags = Intent.FLAG_ACTIVITY_NEW_TASK or Intent.FLAG_ACTIVITY_CLEAR_TOP
}
2. The Manifest Update:
I registered the URL scheme in AndroidManifest.xml so Android knows the app can handle these links:
<intent-filter>
    <action android:name="android.intent.action.VIEW" />
    <category android:name="android.intent.category.DEFAULT" />
    <category android:name="android.intent.category.BROWSABLE" />
    <data android:scheme="expensetracker" />
</intent-filter>
3. React Navigation Configuration:
In AppNavigator.tsx, I provided the linking configuration. This completely eliminated the need for native event listeners.
const linking = {
    prefixes: ['expensetracker://'],
    config: {
        screens: {
            AddExpense: 'add-expense',
        },
    },
};

export function AppNavigator() {
    return (
        <NavigationContainer linking={linking}>
           {/* ... stacks ... */}
        </NavigationContainer>
    );
}
Challenge 2: The Navigation Stack Trap ("GO_BACK" Unhandled)
Solving the cold start exposed a new UX bug. When a user tapped the widget on a cold start, React Navigation would directly mount the AddExpense screen as the first and only screen in the stack.
When the user saved their expense and pressed the close button, the app triggered navigation.goBack(). Because there was no screen underneath it, the app threw a warning: The action 'GO_BACK' was not handled by any navigator.
The Fix:
I implemented a safeGoBack helper. Before going back, it checks navigation.canGoBack(). If the stack is deep, it pops the screen normally. If the stack is empty (because of a widget deep-link), it resets the stack to the MainTabs home screen.
const safeGoBack = useCallback(() => {
  if (navigation.canGoBack()) {
    navigation.goBack();
  } else {
    navigation.dispatch(
      CommonActions.reset({
        index: 0,
        routes: [{ name: "MainTabs" }],
      }),
    );
  }
}, [navigation]);
Bonus: Custom Release App Icon
As a final polish step, I wanted the production app to literally use the same sleek vector drawable I designed for the widget as the main App Icon.
To achieve this without breaking debug builds, I utilized Android's source set merging. I created a src/release/AndroidManifest.xml file that leverages tools:replace to swap the android:icon only when compiling the release APK:
<application
    android:icon="@drawable/ic_widget_add_expense"
    android:roundIcon="@drawable/ic_widget_add_expense"
    tools:replace="android:icon,android:roundIcon">
</application>
Challenge 3: The Samsung "Couldn't add widget" Crash (Vector Strictness)
While the widgets worked flawlessly on emulation, pushing the Release app to older Android devices (specifically Samsung) immediately resulted in a silent crash: the home screen displayed Couldn\'t add widget.
After intense debugging of logcat dumps, I uncovered that the RemoteViews engine—which actually draws Android widgets outside of the React Native process—strictly blacklists specific XML attributes depending on the vendor OS version. For example:
- Including
android:letterSpacingorandroid:tintin older SDK levels triggered an immediateInflateException. - Using raw
<View>nodes as dividers silently crashed the inflater. They must be<FrameLayout>instances instead.
App Optimization & Performance Analysis
Expense trackers must be extremely snappy. Since we are linking massive machine-learning libraries like Google MLKit for Receipt Scanning, the Javascript and Native bundles could easily spiral out of control.
After verifying the widgets, I audited the production release build and instituted an aggressive pipeline to crush the final payload size, successfully compiling the entire app to an incredibly optimized 45MB footprint per device CPU architecture.
Key Optimizations Unleashed:
- ABI APK Splits: A single Universal APK spiked to 118MB. By enabling
enableSeparateBuildPerCPUArchitecture, the build strips unused architectures and delivers a lean, targeted 45MB APK to the specific user (e.g.,arm64-v8a). - Hermes JS Engine: React Native is notorious for slow loads on older JavaScriptCore environments. By enabling Hermes, the JSX is compiled ahead-of-time (AOT) to C++ bytecode for instant startup.
- ProGuard & R8 Full Mode: I explicitly enabled
android.enableR8.fullModeingradle.properties. R8 ruthlessly strips all unreferenced classes from the Google MLKit vision models, minimizing the massive native library footprint. - Compile-Time JS Log Stripping: I configured
babel-plugin-transform-remove-consolefor production builds. This physically deletes every debugging string,console.log, andwarnacross the codebase at compile-time. This saves megabytes of memory and prevents JS execution locks during heavy list scrolling. - Zero-Byte UI Rendering: Because the Custom Widgets were implemented purely in Android XML Vectors natively over the C++ Android framework, they use strictly zero bytes of memory or javascript execution to draw on the home screen!
Conclusion
Building native Android widgets for React Native apps forces you to bridge the gap between OS-level lifecycles, vector mathematics, and internal JS initializations.
While hacking together event emitters and static layouts might work for prototypes, ultimately leaning on platform standards—like Deep Linking, native vector coordinate graphing, and aggressive compiler optimizations—results in a significantly cleaner, faster, and more robust user experience.
Logging a transaction now takes exactly one tap from the home screen, with zero cognitive load and sub-second execution speed, which is exactly how expense tracking should feel.